Summary: Most cellphone cameras today come with “large aperture” lens such as F/2.0 or F/2.2. Since the optical resolution of a “perfect” lens (a lens devoid of any aberration) is inversely proportional to the F/# (the relation is shown in equation 1), one may assume that a F/2.0 cellphone camera lens should be able to resolve fine details on an object as well as a F/2.0 DSLR lens.
 (1)
(1)
where,  ,
,  is the focal length, and
  is the aperture diameter of the lens.
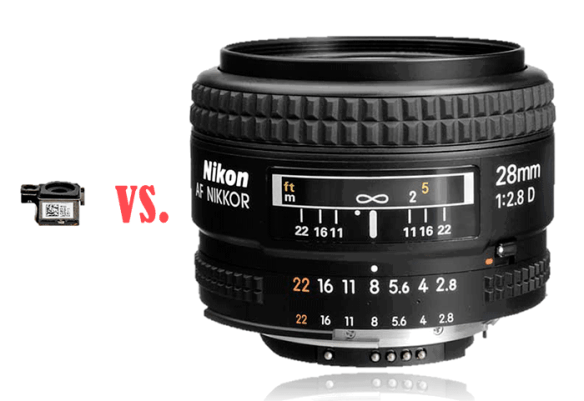
The above image shows two lenses of same F/#, and also of equal normalized focal length. The one on the left is a lens whose 35 mm focal length is about 28 mm (with complete camera module, including the image sensor) from a cellphone, and the lens on the right is a 28 mm DSLR lens.
The optical resolution of a lens determines how close two line-objects or point-objects be placed before the objects cannot be distinguished from each other when viewing through the lens. The minimum resolvable separation,  , is the inverse of
  . The larger the value of (usually measured in line-pairs-per-mm), the better is the resolving ability of the lens. So if the f-number,
  , of a cellphone lens matches the of a DSLR lens, then the equation (1) seems to suggest that they have the same optical resolution! However, as it is shown in the following paragraphs, the ability to resolve fine details of a F/2.0 DSLR lens is in fact much better than a F/2.0 cellphone camera lens. Concretely, if the focal length and the aperture diameter of the cellphone lens is 1/k (k>1) times the respective parameters of the DSLR lens, then the of the two systems are equal but the resolving ability of the cellphone lens is
  times that of the DSLR lens. For example, a 50 mm, F/2.0 lens (D = 25 mm), which is a first order approximation of a 50 mm DSLR lens, can resolve details as fine as 54 microns focused at a distance of 2 meters. Whereas a 5 mm, F/2.0 lens (D = 2.5 mm), a close approximation of a typical cellphone camera lens, can resolve details only up to about 540 microns focused at the same distance. This is essentially a manifestation of the difference in magnifications (or angular resolution) of the lenses.
Please read the rest of the article for details.
Continue reading →
 Who says math is not beautiful? Anyone who doubts the beauty in math must check out algebraic surfaces.


 In this post I will describe the process of installing
